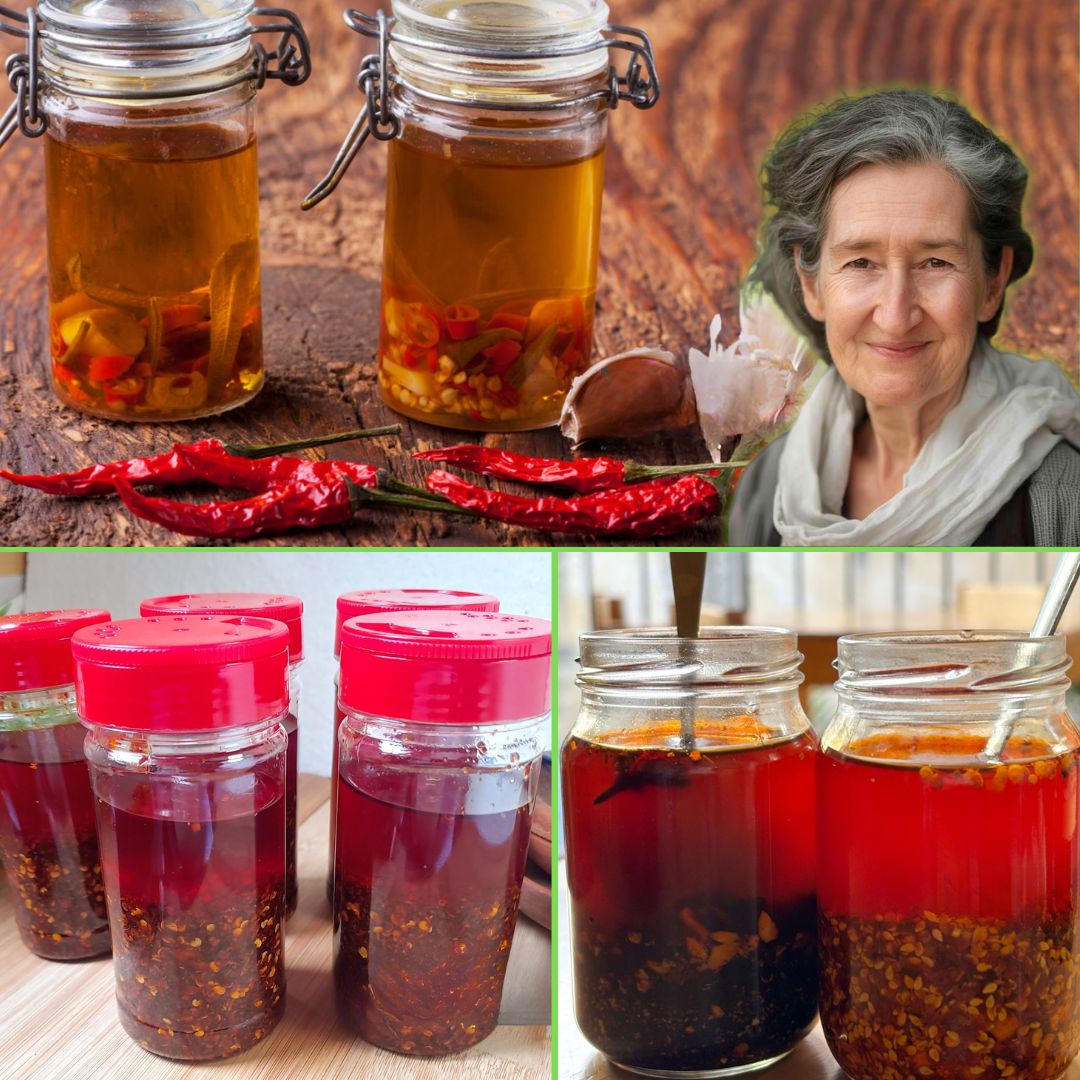
Homemade Chili Garlic Sauce – Spicy, Savory & Easy to Make
Introduction
If you’ve ever craved that perfect balance of fiery heat, bold garlic punch, and savory depth in a sauce, then homemade chili garlic sauce is your new kitchen essential. This condiment transcends cuisine boundaries — whether you’re drizzling it over noodles, stirring it into soups, or using it as a dipping sauce, it instantly elevates any dish with vibrant, spicy flavor.
Commercial chili garlic sauces often contain preservatives, excessive sugar, or artificial additives that dull the authentic kick and freshness you desire. Making your own is surprisingly simple and lets you customize the heat level, texture, and flavor intensity exactly how you like it. Imagine the satisfaction of reaching for a jar of your own hand-crafted sauce whenever your meal needs a spicy lift.
In this post, I’ll walk you through a comprehensive, step-by-step guide on how to make homemade chili garlic sauce that’s fiery, savory, and utterly addictive. From ingredient selection and essential tools to insider tips and serving ideas, you’ll be empowered to whip up this versatile sauce effortlessly. Ready to spice up your culinary life? Let’s get started.
Why You’ll Love This Recipe
This homemade chili garlic sauce recipe stands out because it’s tailored for both flavor and simplicity. Unlike bottled sauces loaded with excess sugar or preservatives, this recipe focuses on the freshness of real ingredients — fresh chilies, garlic, vinegar, and a hint of natural sweetness — combined to create a harmonious balance of heat, acidity, and savoriness.
What makes this recipe truly irresistible is its versatility and ease. You don’t need a long list of obscure ingredients or specialized kitchen gadgets — just a handful of basics you likely already have. The sauce stores beautifully, intensifying in flavor over time, and you can adjust the heat to suit your preference, from mild warmth to fiery blaze.
The process is quick, but the results are deeply satisfying — you get a bright, aromatic sauce bursting with authentic flavor that complements everything from stir-fries and marinades to sandwiches and grilled meats. Plus, making chili garlic sauce at home means you avoid unnecessary additives and control every bite’s nutrition.
Ingredients
For a perfectly balanced chili garlic sauce, gather the following fresh and pantry staples:
- 10-12 fresh red chili peppers (like Fresno, Thai bird’s eye, or red jalapeños)
- 6-8 garlic cloves (peeled)
- 1/4 cup distilled white vinegar or rice vinegar
- 2 tablespoons granulated sugar or honey (adjust to taste)
- 1 teaspoon salt
- 2 tablespoons vegetable oil or neutral oil (optional for richness)
- 1/4 cup water (to adjust consistency)
Necessary Tools
No fancy equipment needed — here’s what you’ll use:
- Food processor or blender (to puree the sauce smoothly)
- Sharp knife and cutting board (for prepping chilies and garlic)
- Measuring spoons and cups
- Small saucepan (for simmering)
- Clean sterilized jar or bottle for storing the sauce
- Wooden spoon or spatula
Ingredient Swaps and Additions
Feel free to customize your sauce depending on availability and taste preferences:
- Chili varieties: Use milder peppers like red serrano for less heat or super hot habaneros for fiery punch. Dried chilies soaked in warm water can be substituted if fresh are unavailable.
- Sweetener: Substitute sugar with maple syrup, agave nectar, or coconut sugar for different flavor profiles.
- Vinegar: Apple cider vinegar offers a fruitier tang, while white vinegar provides sharper acidity.
- Oil: Skip the oil if you prefer a thinner, more tangy sauce, or substitute with toasted sesame oil for a nutty twist.
- Add-ons: Add a splash of soy sauce for umami depth or a squeeze of lime juice for freshness.
Experimentation helps you create a signature chili garlic sauce that suits your palate perfectly.
Step-by-Step Instructions
Step 1: Prepare Your Chilies and Garlic
Wash and dry your fresh chilies thoroughly. Remove the stems and roughly chop them (seeds included for heat). Peel the garlic cloves and roughly chop them as well to help blending.
Step 2: Blend the Base
Add the chopped chilies, garlic, sugar, and salt to your food processor or blender. Pulse until coarsely chopped.
Step 3: Simmer the Mixture
Transfer the chili-garlic mixture to a small saucepan. Add vinegar, water, and oil (if using). Bring to a gentle simmer over medium heat, stirring occasionally. Allow it to cook for 5-7 minutes until the flavors meld and the sauce thickens slightly.
Step 4: Blend to Desired Consistency
Allow the mixture to cool slightly, then return it to the blender. Pulse or blend until smooth or leave slightly chunky depending on your texture preference.
Step 5: Cool and Store
Pour the sauce into a sterilized jar or bottle. Let it cool completely before sealing and refrigerating. The flavors will deepen after a day or two, so patience pays off.
Pro Tips for Success
- Choose fresh, firm chilies: This ensures a vibrant color and crisp flavor without bitterness.
- Use gloves when handling hot peppers: To avoid irritation or accidental eye contact.
- Control heat by removing seeds: Removing seeds before blending reduces intensity if desired.
- Adjust sweetness gradually: Start with less sugar and add more to balance acidity.
- Sterilize storage jars: This prevents spoilage and extends shelf life.
- Store refrigerated: Homemade sauces lack preservatives and keep fresh for up to 3 weeks.
For best results, taste and adjust seasoning before storing to perfectly match your flavor preferences.
Serving Suggestions
- Use as a dipping sauce for dumplings, spring rolls, or grilled chicken skewers.
- Stir into stir-fries or fried rice to add a spicy kick.
- Drizzle over tacos, burgers, or sandwiches for extra flavor.
- Mix into mayonnaise or yogurt to make spicy spreads or dips.
- Blend into salad dressings for a zesty twist.
Storing and Reheating
Store your chili garlic sauce in an airtight jar in the refrigerator. It will keep fresh and flavorful for up to 3 weeks. The flavors actually improve over the first few days as they meld.
If you want to reheat before serving (e.g., for dipping sauces), warm gently in a small saucepan over low heat. Avoid boiling as it can alter flavor and texture.
For long-term storage, you can freeze portions in ice cube trays and thaw as needed.
Nutritional Information
A rough estimate per tablespoon serving:
- Calories: 15-20 kcal
- Carbohydrates: 3-4 g
- Sugars: 2-3 g
- Fat: 1 g (if oil included)
- Sodium: 200-300 mg (depending on salt added)
- Fiber: 0.5 g
- Vitamins: Vitamin C (from fresh chili), trace amounts of B vitamins
This sauce is low in calories and fat but rich in antioxidants and vitamin C from fresh chili peppers, making it a flavorful yet healthy condiment option.
FAQs
1. How spicy is this sauce?
The heat depends on the type of chili peppers you use and whether you include seeds. Using milder peppers or removing seeds reduces heat.
2. Can I make this sauce vegan?
Yes! This recipe is naturally vegan, using plant-based ingredients only.
3. How long does homemade chili garlic sauce last?
Stored refrigerated in a sealed jar, it lasts up to 3 weeks. Always use a clean spoon to prevent contamination.
4. Can I use dried chilies instead of fresh?
Yes, soak dried chilies in warm water for 20 minutes, then drain and blend.
5. Is it possible to make this sauce oil-free?
Absolutely! Skip the oil for a tangier, thinner sauce.
Conclusion
Making your own homemade chili garlic sauce is a rewarding and delicious way to bring authentic, spicy flavor into your kitchen. With just a handful of simple ingredients and easy steps, you create a versatile condiment that livens up countless dishes. Its fresh, balanced heat and rich garlicky punch can transform everyday meals into memorable feasts.
Try this recipe, customize it to your liking, and keep a jar ready for whenever your palate craves a savory, spicy kick. For even more exciting recipes and kitchen hacks, explore our posts on homemade sauces and spice blends.